Table of Contents
Before you start this chapter
- Install FileZilla on your computer; it is freely available from its project website for Windows, Mac OS X, and GNU/Linux.
In this chapter you’ll learn how to connect to your server ready to transfer files using the FileZilla program. It has been assumed that you have a working copy of this program installed on your desktop computer.
A server installed with Symbiosis will be running SSH, and will have had the admin user account created. This allows you to connect via SFTP to administer the machine.
The admin account should be used when administering a Symbiosis system to ensure that files and directories have the correct permissions.
Usage of SFTP is mandated for administrating the machine, such that all data are passed encrypted over the network.
Throughout the documentation the example server name example.vm.bytemark.co.uk should be substituted for your own server name.
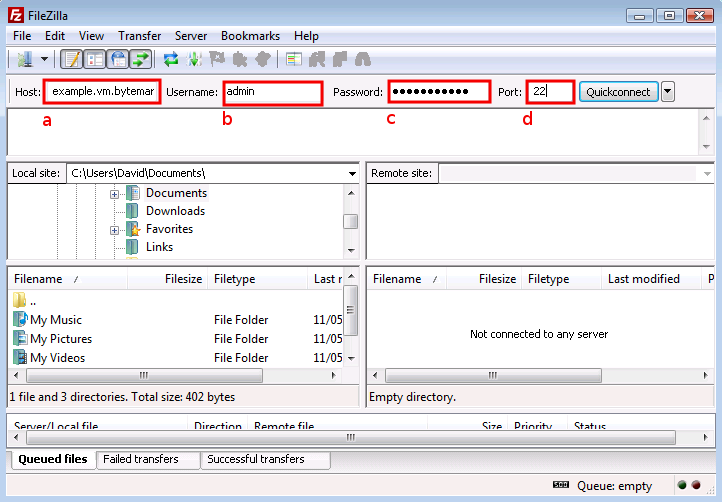
Start FileZilla and enter the details in the text fields below the program’s toolbar. The name of your server goes in the text field a and admin in the field b.
Complete the connection details by filling in the field c with the password for the admin user, and the standard SSH port number, 22 in the field d.
Click the button a to the right of the text fields; the first time you do this you’ll get a warning message that is safe to ignore, so check it’s box b and click the button c.
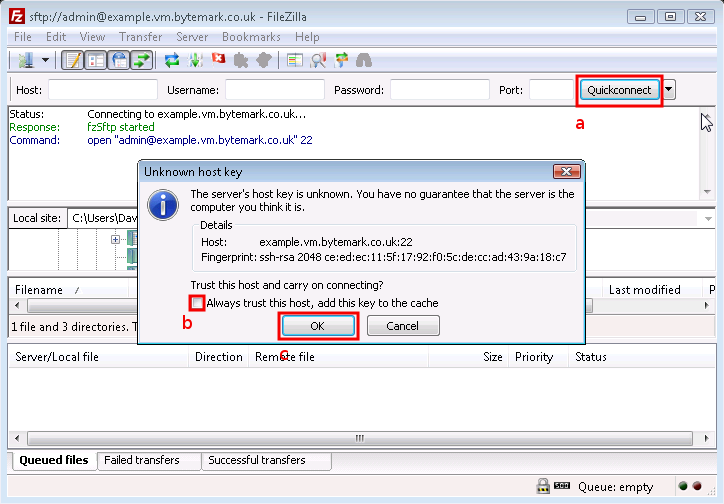
In the text area immediately below the you’ll see messages scroll by as the connection to the server is made.
Tip
You won’t need to enter those details each time you connect. Click the small button to the right of the button to reveal the as a history item. In future simply select that link.
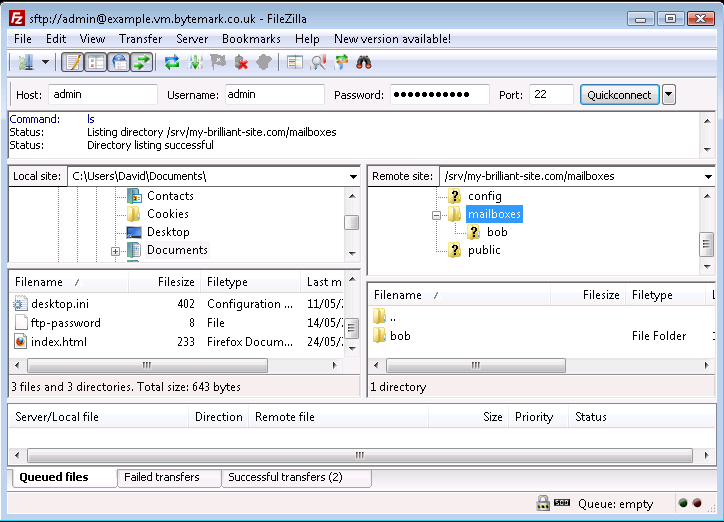
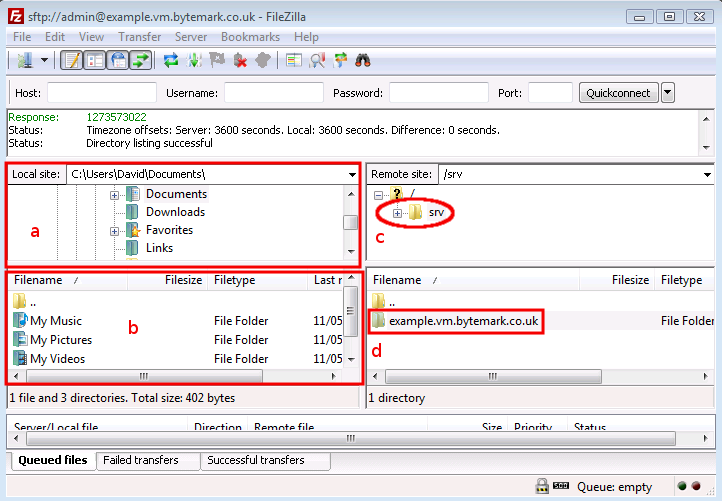
The following figure shows FileZilla’s layout after successfully
logging in. The display is divided into four main sections, the
top left pane shows a directory tree, with the directories on your
local computer, labelled a. Beneath that is a listing showing the
contents of the currently selected local directory, labelled b.
Then the top right pane shows the directory tree of the remote
machine. When logging in as admin this will show /srv/
(c). Finally beneath that is the contents of that directory.
Initially this will only contain one directory named after the
machine. In this case example.vm.bytemark.co.uk/ is
shown (d).
Once you’ve been able to successfully connect to your server, via FileZilla, you may proceed to configure email, or setup your website.
This section demonstrates how to carry out some common tasks with the FileZilla client:
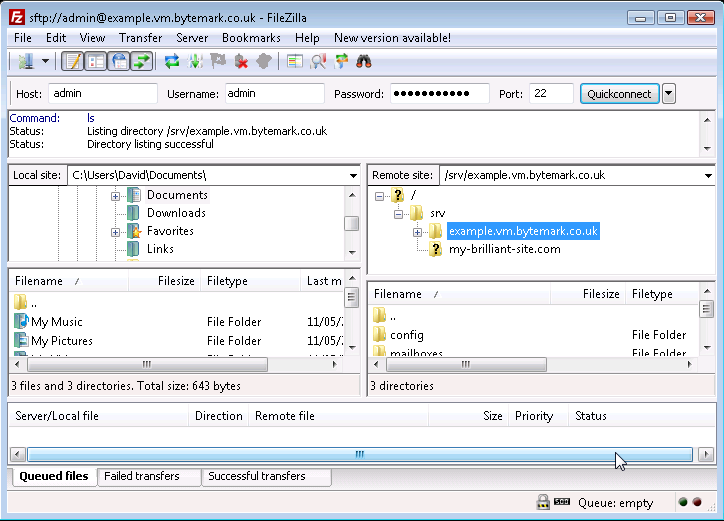
To open the
/srv/directory on the server, click the icon.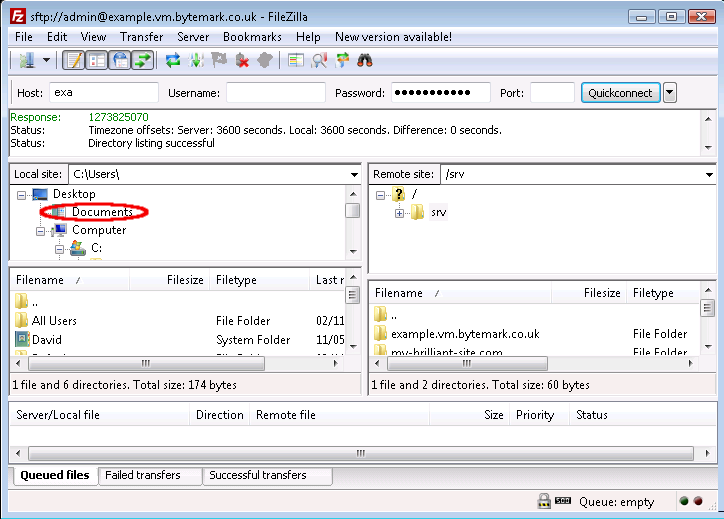
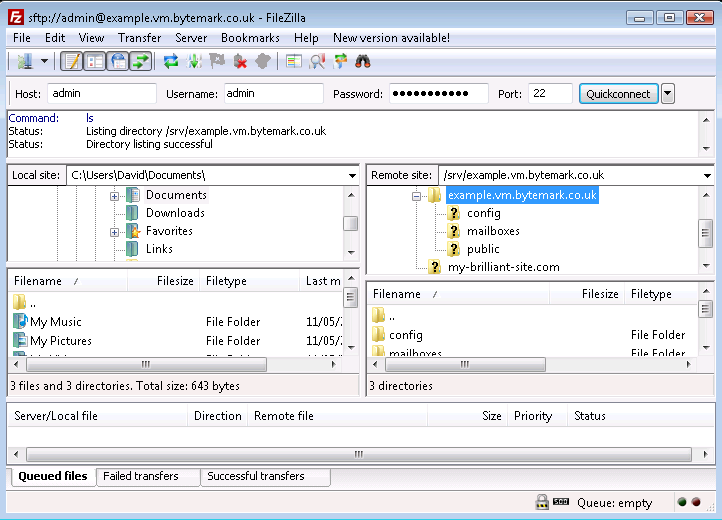
Notice that the folders that appear in the tree display are already displayed in the window. You can use the a and b to adjust the view; as in any desktop window you can also use the c to expand the FileZilla display to full screen or just drag it’s corners in the usual way.

When you click on the label (not the directory ), the control appears. The contents of the directory are already displayed in the window.
Click the control to see those contents as part of a tree view and notice that you now have a control, which could be used to close this detail of the file system structure.
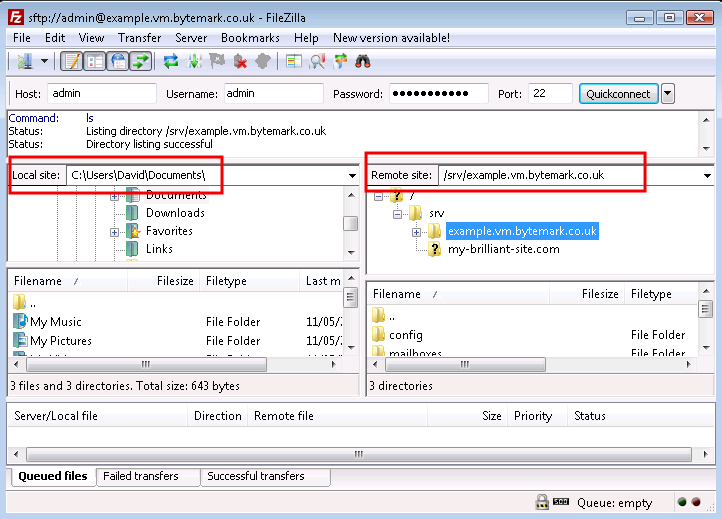
Those operations were all carried out on the right side of the screen where the , in this case the server example.vm, is represented. Comparable operations can be carried out on the left side of the screen, where the . represents the file system on the desktop machine.
In this walkthrough, a mailbox will created for a user alice. That is done
by creating a directory under the /srv/my-brilliant-site.com/mailboxes/ directory. (The configuration of email is described fully in Chapter 5, Configuring email.)
Highlight the parent directory by pointing at the label (not the icon) and left-clicking.
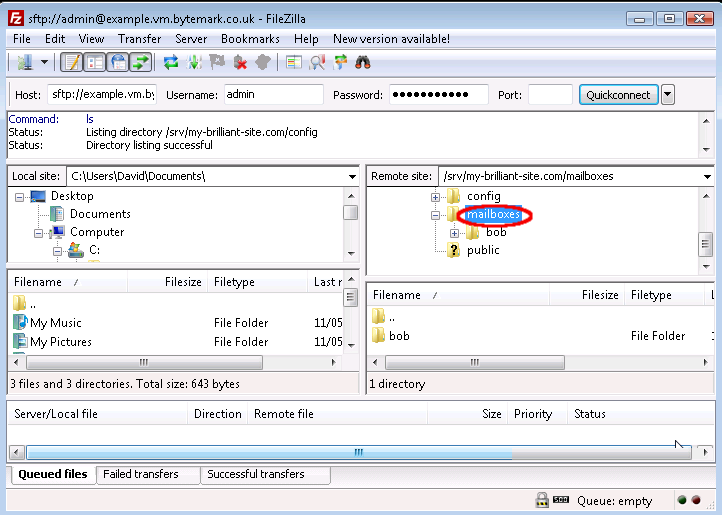
Right click to bring up the menu and select .
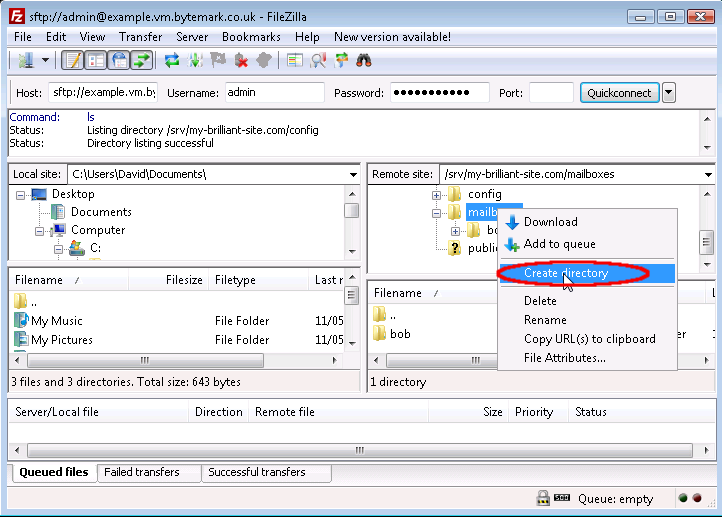
The starts; the default path
/srv/my-brilliant-site.com/mailboxes/. is as we want it, but not the default nameNew directory/.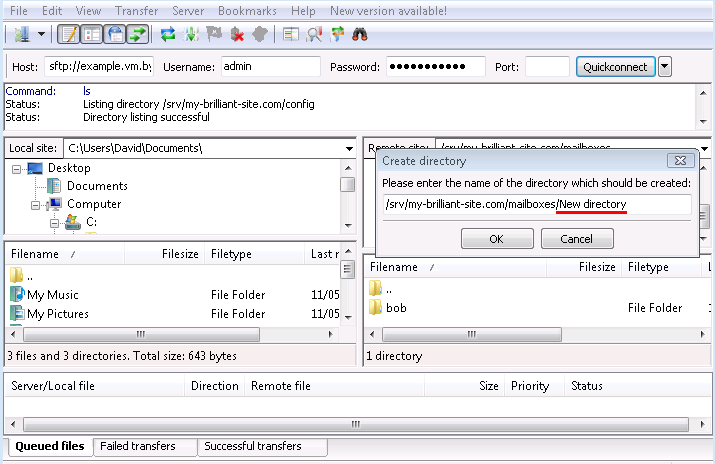
Edit that, replacing
New directory/withalice/, then click the button.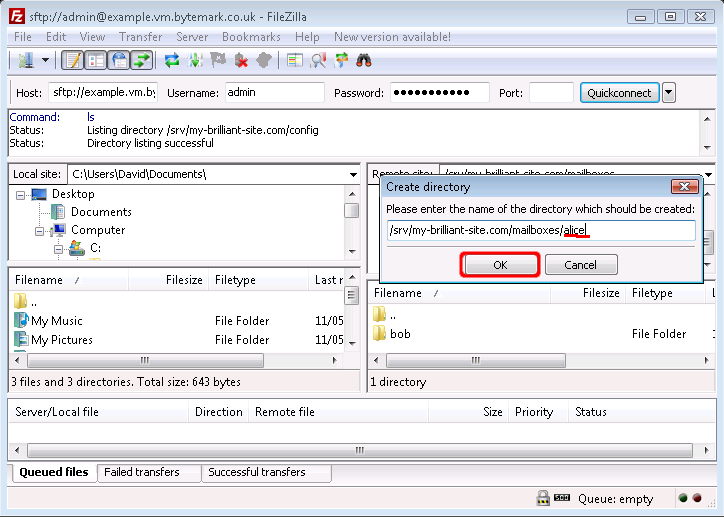
The
/srv/my-brilliant-site.com/mailboxes/alice/has been created.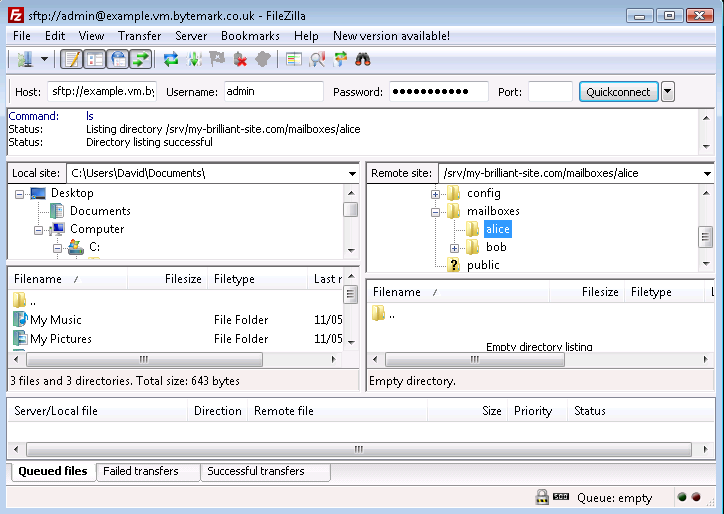
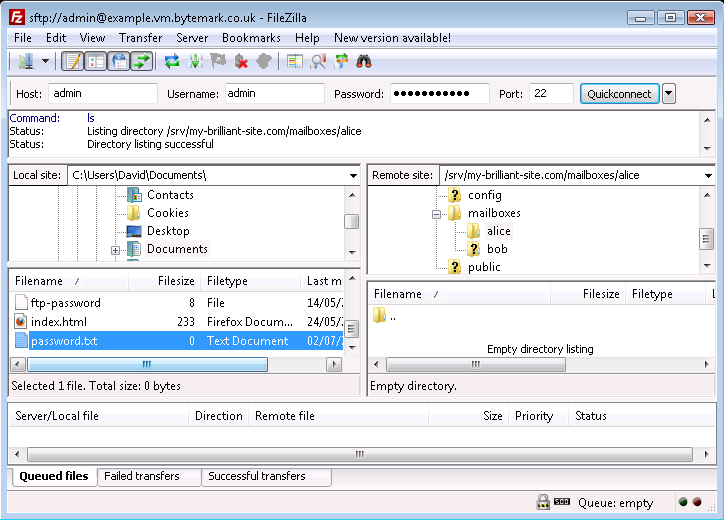
Unfortunately creating a file upon the remote server cannot be completed directly within FileZilla, but that limitation can be skirted around by creating the file on your local machine and then uploading it to the correct location on the server.
Note
Windows desktop systems tend to silently add the .txt extension when you create a plain text file; this means that the file will need renaming before uploading.
This walkthrough demonstrates the procedure for allowing the user alice to logon to the mailbox at the my-brilliant-site.com domain; in doing so, it covers the creation, upload and rename operations.
The Notepad program has been used to create a plain text document that contains a secure password on a single line. Although the name "password" was specified as the filename, FileZilla reveals that the ".txt" extension has been silently added to that.
Right click on the
password.txtfile to bring up the menu and select the option.
Rename the file by removing the unwanted .txt extension.
Press your Enter key to complete that; the file has been renamed from
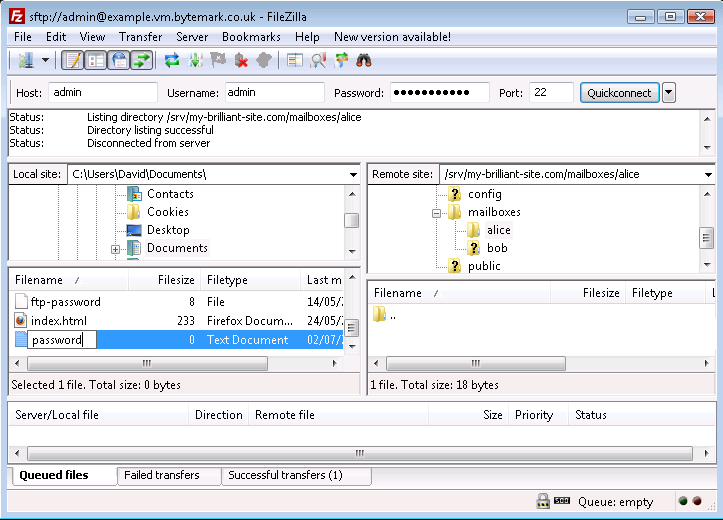
password.txttopassword. Move to the area on the right side of the FileZilla display and navigate to the/srv/my-brilliant-site.com/mailboxes/alice/directory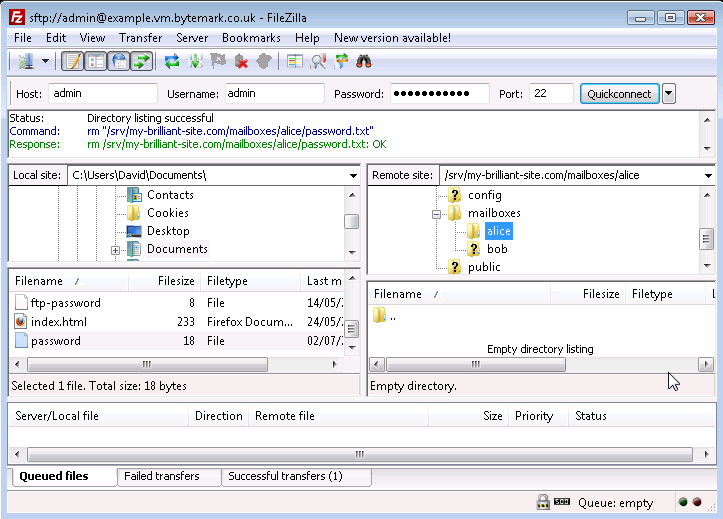
Moving back to the left side of the FileZilla display, again highlight the
passwordfile and right click to bring up the menu. This time select the option.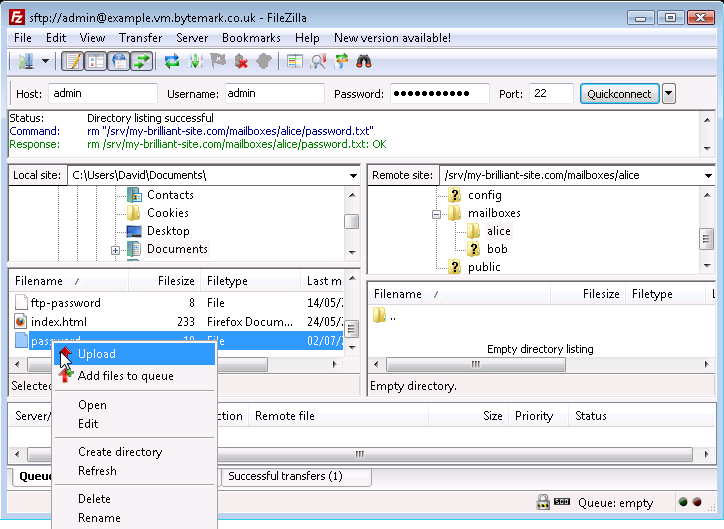
The
passwordfile has been created on the server in effect, by uploading it from the local desktop machine. An alternative method of achieving this is to select the file and in the local area and drag it to the area of the server.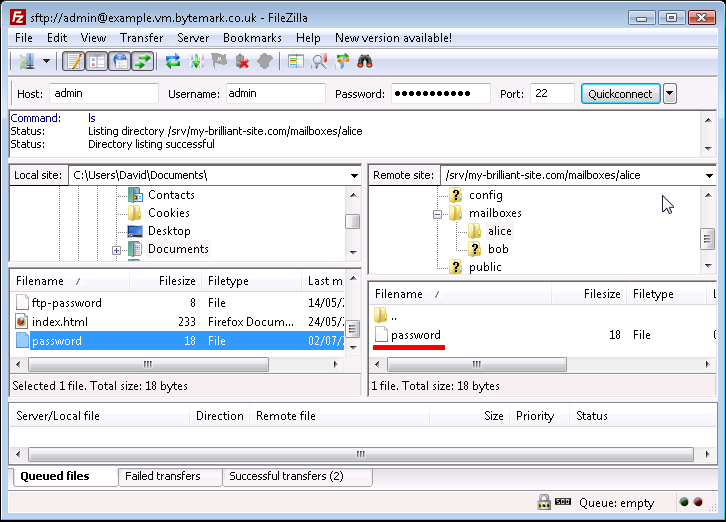
The
passwordfile on the local machine is no longer needed; select and right click then choose the option.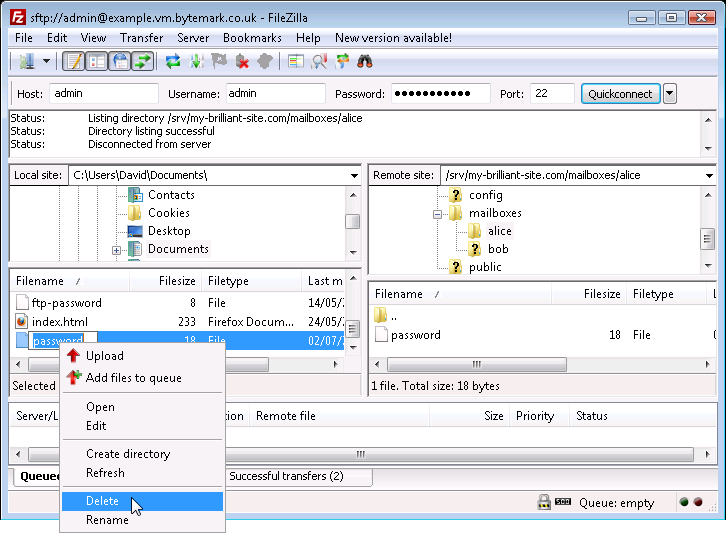
Confirm that you do want to delete the file by pressing the button in the dialog.

The local
passwordfile has been deleted. In the same way files and also directories can be deleted from the server, the only diffence being that the dialog that comes up is less detailed than the local dialog. Below is what would be seen if user alice was to be removed; thealice/directory and the option have been selected.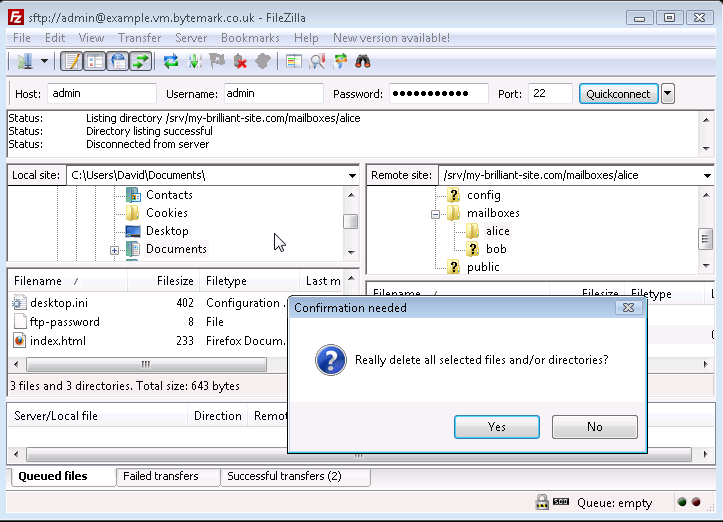
The button in the dialog was selected and the
alice/directory has been removed.