Table of Contents
Before you start this chapter
- Connect to your server via SFTP (see Chapter 3, Connecting to your server with FileZilla and SFTP).
This chapter deals with configuring email for a domain, namely setting up mailboxes to receive email. The Symbiosis system makes this very simple, as the process of creating a new mailbox, or email account, is a simple matter of creating a few files and directories.
As with our previous examples we’ll be using the my-brilliant-site.com domain for demonstration purposes, but you should substitute your own domain.
Again for example purposes we’ll be demonstrating the creation of a new email account, for the user "bob", which will correspond to the email address bob@my-brilliant-site.com - you should change the name "bob" to the username(s) you desire.
It has been assumed that the first few steps in Section 4.1, “Hosting a web page using your own domain” have
been followed, i.e. that a directory has been created under
/srv/ for the domain my-brilliant-site.com.
Start FileZilla and connect to your machine.
Then right click on the
/srv/my-brilliant-site.com/directory and select from the menu. Set the new directory name to bemailboxesand press the button.Repeat this step to create the directory
mailboxes/bob/which makes a mailbox for the address bob@my-brilliant-site.com.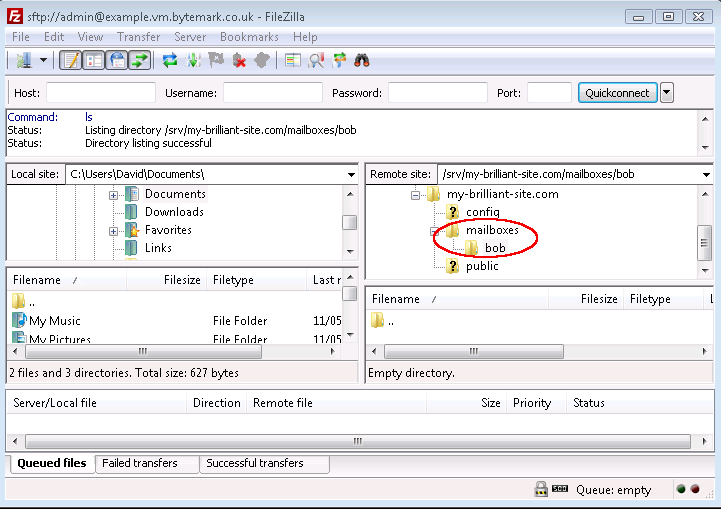
Use a text editor such as Notepad to create a file
passwordon your desktop machine which contains a secure password.Under Windows a
.txtextension will be added to the filename which is not wanted. So before you upload the file use FileZilla to rename it frompassword.txttopassword. That is done by clicking with the right mouse button on the file in the lower right hand pane, and selecting from the menu that appears.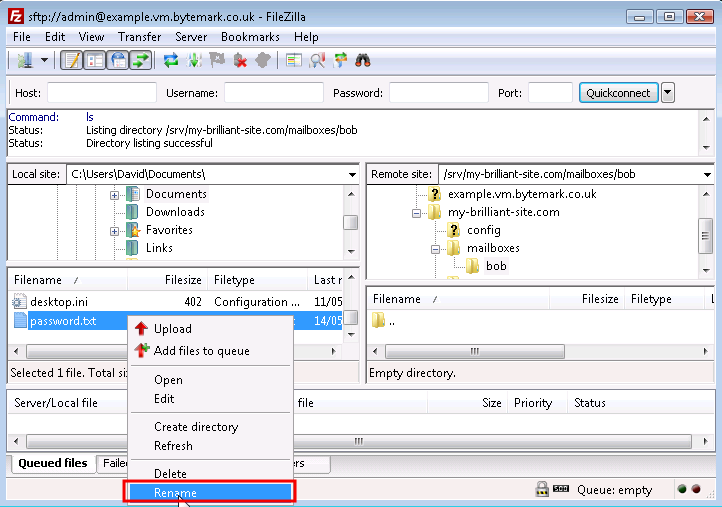
To upload, right click on the filename and select from the menu, making sure that the directory
/srv/my-brilliant-site.com/mailboxes/bob/is shown in the text area.
That is all that is needed to set up a new mailbox. To test we can immediately use the webmail application, SquirrelMail, supplied with Symbiosis.
If you would prefer to have emails to a new address sent on to, create a file
named /srv/my-brilliant-site.com/mailboxes/bob/forward. In this file just
enter the name of the account that mail should be forwarded to; this might be
something like dave@example.com.
This file can do many other things than just forwarding email, as explained in its reference section.
Users can configure their own server-side filtering rules using the ManageSieve protocol. This is a standard protocol which can be used to create Sieve scripts which are used to filter email into folders on behalf of the user.
Sieve is a powerful language that can be used to achieve * mail deliveries into specific folders, * vacation messages, * flagging or highlighting mail.
ManageSieve clients are available for several mail clients, the most common of which is Mozilla Thunderbird via its Sieve add-on.
Symbiosis comes with in-built virus and spam detection, however it is not enabled by default. There are two principal aspects to this, namely
- The use of SpamAssassin to scan each email to determine if a message is unwanted;
- The use of ClamAV to detect viruses in emails.
Each of these is configured separately, on a per-domain basis, giving choice as to which preventative measures are applied to your email.
Email can be rejected or tagged, based on its spam score determined by SpamAssassin. This is not enabled by default, but can be enabled in much the same way as the blacklists above.
The default action is to reject, i.e. bounce, email that is determined by SpamAssassin to be spam. This can be changed to accept all email, but tag it with a header field to allow users to filter it themselves.
Once scanned, a message will have three extra headers added, for example for an innocent message might have a score of 1.2. In which case it has the following headers added.
X-Spam-Score: 1.2
X-Spam-Bar: +
X-Spam-Status: innocent
A more guilty message might have a score of 4.2, but note that this message is still deemed "innocent", since it scored less than 5, which is the default threshold at which SpamAssassin deems messages to be spam.
If a message scores more than 5, and the domain has "tag" in its
config/antispam, then the X-Spam-Status header will be set to spam.
Connect to your machine using FileZilla
On the remote directory tree, navigate to
/srv/my-brilliant-site.com/config/.On your local machine create a file called
antispam. If you want to reject email, i.e. bounce email, that is classified as spam, this file should be empty. If you’d rather accept all email, but tag it as spam, this file should contain the wordtag.Having created the file, right click on it and select to transfer it to the remote system. Make sure that the remote file has the correct name, i.e. no extra
.txtextension.
ClamAV is activated in a similar way to SpamAssassin. It can also
be set to tag or reject. Again, a header is added to message that has been
scanned. In this case the header that is added is X-Anti-Virus. This is set
to clean if no viruses were detected, otherwise infected, but only if
configured to tag.
Connect to your machine using FileZilla
On the remote directory tree, navigate to
/srv/my-brilliant-site.com/config/.On your local machine create a file called
antivirus. If you want to reject email, i.e. bounce email that has viruses in, this file should be empty. If you’d rather accept all email, but tag it to show that it has a virus in, this file should contain the wordtag.Having created the file, right click on it and select to transfer it to the remote system. Make sure that the remote file has the correct name, i.e. no extra
.txtextension.
Although most users will prefer to receive and write their emails using a dedicated client (such as ThunderBird, or Microsoft Outlook) the Symbiosis system includes a mail client you can access with nothing more than a web-browser.
This section briefly documents using the Squirrelmail webmail system.
To log in to webmail, start your browser and head to http://my-brilliant-site.com/webmail.
Enter your email address in the field, and your password in the field.
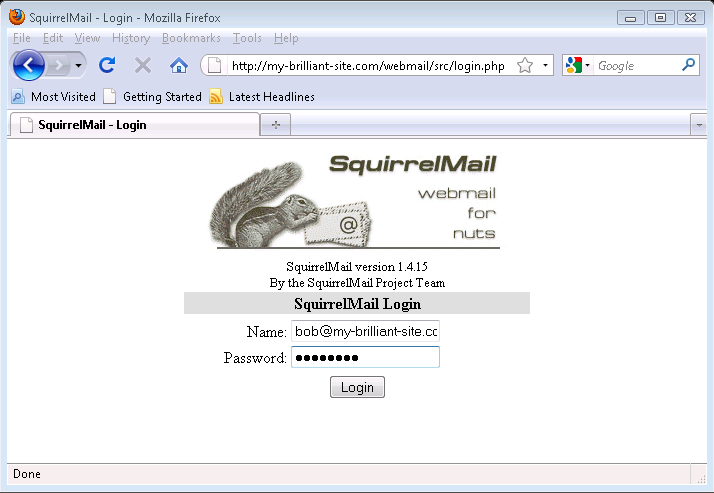
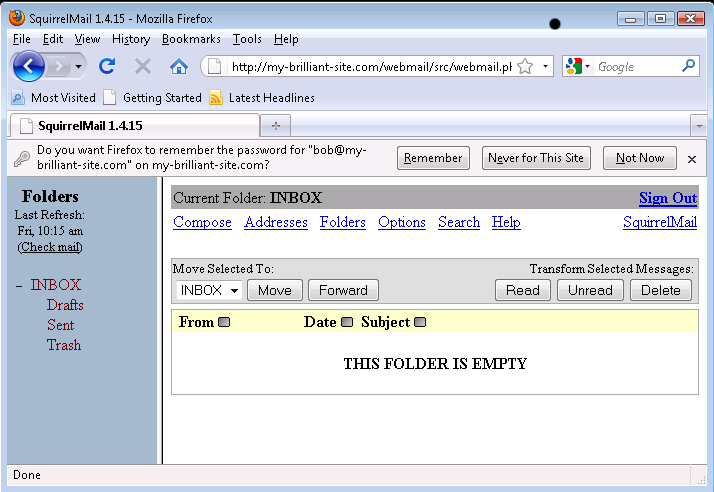
Click the button, and assuming the Name and Password fields were correct, you will be presented with your Inbox where you can read and send email.
The following details might be needed when setting up a mail client to use an email account. The user of bob@my-brilliant-site.com on the machine example.vm.bytemark.co.uk has been chosen for these worked examples.
It is recommended that all communication with the mail server is conducted over encrypted connections, either using SSL, or TLS.
Incoming email can be collected using either the IMAP or POP3 protocols. IMAP is generally recommended over POP3 as it can handle folders, push notification, can selectively download message parts, and the email remains on the server enabling back-ups to be made.
Outgoing email is sent using SMTP. It is good practice to send any outgoing email via the Symbiosis server, rather than any relay service provided by your ISP.
Managing sieve filters is done using the ManageSieve protocol.
For both sending and receiving email, and managing sieve filters, the following login information would be used.
- Username
- bob@my-brilliant-site.com
- Password
-
(contents of
/srv/my-brilliant-site.com/mailboxes/bob/password) - Server name
- example.vm.bytemark.co.uk
The default ports are used for all protocols. For further details see Section 15.1, “Port Configuration”.
It is common for Internet service providers to block the standard outgoing email port, i.e. port 25. If your email client complains that it cannot connect to your server on this port, then port 587 is provided as an alternative.